A Happy New Year to all the readers and visitors of Prodigal Concepts. I wish you all the best this coming year as we are ushered into the year of the Dragon – 2012.
The holidays are blurring out, (but the holiday weight seems to be staying longer than necessary) and before we all move on to the challenges of the coming year let us go with a bang and celebrate one last time with an out of this world wallpaper tutorial.
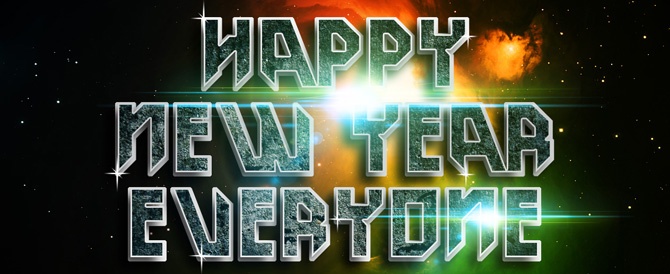
What we will be making

What we need
Font
Federation Font from Legacy of Defeat
Textures
Stainless from Photo Bucket
Concrete from deviantart.com
Grunge tile from Lost and Taken
Optic flares
The genius behind psdbox.com came up with some out of this world optic flares that you may find really useful in your future projects get it here.
Nebula
For the second time we will be calling on the Nebula which we are borrowing again from the uber awesome tutorial of Patrick Monkel Making a Superhero Movie Teaser Poster from wegraphics.net. Last used here on A photo manipulation tutorial, skyscape – The Ninth Planet
Set the stage
Open Photoshop and create a new document Ctrl + Shift + (N), make it 1280 x 800 pixels. Name it whatever you like, I’m going to call mine “2012 wallpaper”

Create the mood
Start with a new layer Ctrl + (N) and call it “background”, then set your foreground color to #797978 and your background color to #1a1a1a. Take your Gradient Tool (G) and from the gradient picker choose Foreground to Background and set style to Radial Gradient.
Drag your mouse from the center going diagonal to the lower right hand corner.

Create another layer Ctrl + (N) and call it “gradient-light”, set your foreground color to #c6c05c and the background color to #05394e. Keep the rest as it is and drag your mouse like before. Change the Blending Mode to Overlay.
Mystify the background
Ctrl + (N) a new layer and call it “cloud”, set your foreground color to #835d2c and the background color to #261501. Go to Filter > Render > Clouds, set Blending Mode to Overlay. You should get something like this.

Make another layer call it “gradient-blue” and set your foreground color to #698aab and the background color to #1a5c9f. Get your Gradient Tool (G) and set style to Linear Gradient. Drag it across your stage from top left diagonally to your bottom right. Set Blending Mode to Multiply.
Time to get our “bw-nebula” image out, just go to File > Place (navigate to the location of the bw-nebula image) then click Place. Make sure it’s centered, now we will Edit > Transform > Rotate 180° and change the Blending Mode to Screen.

Add another layer and name it “4gradients”, then get your Gradient Tool (G) from the Tools Palette and click on the gradient picker, the gradient editor window should pop up. Choose a 4 colored gradient then replace each color from left to right with something like Blue (or Cyan), Green, Yellow, Red.

Now starting from the top left drag it across diagonally to the bottom right. And set the Blending Mode to Overlay.

And on the 7th layer we almost rested… but not, because we will make one final layer for the background and call it “light-effects” fill this layer with #ffffff, then go to Filter > Render > Light Effects. Change style to RGB Lights, and set Intensity to 60 and Focus to 96 click OK. Go back to Filter > Blur > Gaussian Blur give it a Radius of 100% then set the Blending Mode to Overlay and reduce the Opacity to 75%.
Type treatment
Take your Type Tool and set the font family to the Federation font we downloaded from “Legacy of Defeat”. Set your font size to 130px and font tracking to 100.
Since it’s just a couple of days till the year ends why don’t we welcome the coming year by typing

Turn this into a selection, Ctrl + click on the type layer, then go to Select > Modify > Expand (Expand by: 5px). Now create a layer below the type and name it “outline” fill your selection with white. Temporarily hide the type layer by poking the eye on the left of the layer.
Go to Blending Options and set the following settings:
Drop Shadow > Blend Mode: Multiply, Opacity: 75%, Angle: 45°, Distance: 20px, Size: 10px
Inner Glow > Blend Mode: Screen, Color: White
Bevel and Emboss > Style: Inner Bevel, Technique: Smooth, Depth: 100%, Size: 25px, Soften: 10px, Angle: 45°,
Color Overlay > Blend Mode: Screen, Color: #3f464d
Stroke > Size: 1px, Position: Outside, Color: #dddddd
Place the Grunge tile texture above the “outline” layer and make sure the entire selection is covered now clip it to the outline by using Alt + click between the two layers. Add an Adjustment Layer – Brightness and Contrast then clip this to the Grunge tile texture and give it a -75 Brightness and -24 Contrast.
Unhide the type layer, and set the following
Blending Options > Drop Shadow > Distance: 21px, Size: 21px, Angle: 45°
Then place the Stainless texture above this type layer and clip it.
Blending Options > Color Overlay > Blend Mode: Soft Light, Color:#001d29
Do the same for the Concrete texture after placing it above the Stainless texture, clip it then set the Blend Mode to Overlay.
Group this set and call it “content”.

Give it some POW!
On a new layer with your Elliptical Marquee Tool (M) draw a very thin ellipse, I made mine around 206 x 19 pixels, deselect then go to Filter > Blur > Motion Blur Set Angle to 0° and Distance to 90px click OK. Duplicate this layer then Edit > Transform > Rotate 90°, duplicate this layer then rotate 45° to the left.
Shrink the last copy to around 40% and the first copy to 60%. Group them together and name the group “glint” now duplicate this group 6 times (or more) and place them randomly on our content somewhere around the edges of the type layer.


And finally, place some of psdbox.com‘s Optic Flare effects, I will be using Optical-4b and Optical-8c. Just set the flares Blending Mode to Screen and drag it to where you feel it could give the optimum effect. Play with it until you are satisfied.
That’s it I hope you guys enjoyed this tutorial and be sure to share it.
A very Happy New Year to everyone!
May this coming year bring us all closer to our dreams, woot, woot, woot.

Comments
5 responses to “New Year 2012 Sci-fi inspired wallpaper tutorial”