
Like it or not social networking still rules as a means to drive traffic to your site. I know there are tons of tutorials out there on how to create cool social icon buttons but since you’re already here why not stay and learn a few basic tricks to your own glassy orb icon in Photoshop. Which you can use in any of your projects and its not just for social icons it can be used as a call to action button or web links to an affiliate site. So let us begin our lesson for today.
What we will be making
If you want get updated on what’s happening here at Prodigal Concepts make sure to be one of us and LIKE us on facebook OK?

Step 1 – Setting the stage
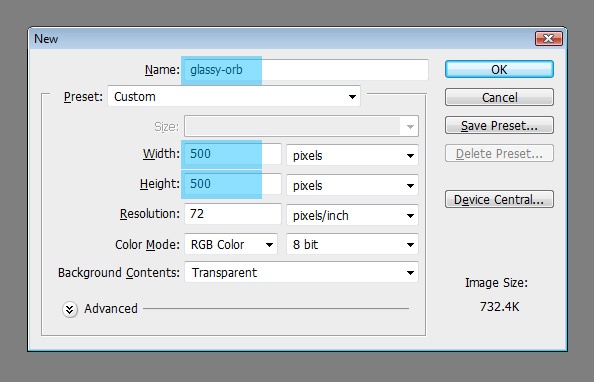
Open Photoshop and create a new document with a 500×500 pixel dimensions let’s name this file “glassy-orb”.
Step 2 – Background
First thing we will do as create a nice looking background, make your “Foreground #badff7” and the “Background #02578e” then with the Gradient Tool (G) selected set the gradient to Foreground to Background and style to Radial Gradient.
Now go to the center of our work area and drag it diagonally going towards the bottom right. Rename this layer as “main-bg”.
You should have something like this.

Add some noise to give it more character, go to Filter > Noise > Add Noise adjust the following settings Amount: 2%, Distribution: Gaussian, tick Monochromatic.

Step 3 – the Orb
Create a New Layer and rename it “orb” then grab your “Ellipse Tool (U)” from your shapes pallete and drag it across our work area while holding the Shift key to keep it proportion to make a nice circle. Fill it with the foreground color. Keep it centered on your work area by making a selection of the outline (Ctrl + A) and using Align vertical center and Align horizontal center buttons.

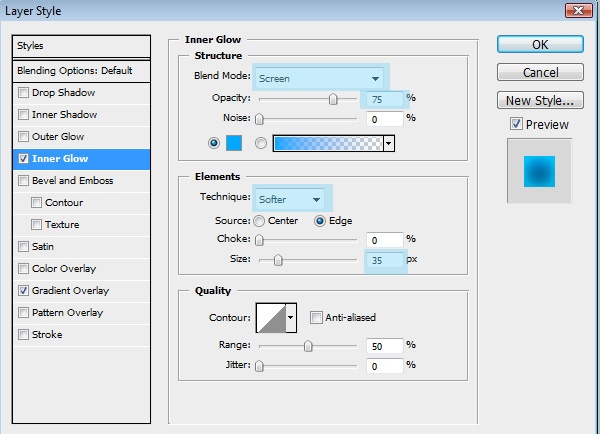
Right click the “orb” layer and go to Blending Options to access Layer Styles then give it an Inner Glow with the following settings, Color #01a8fe
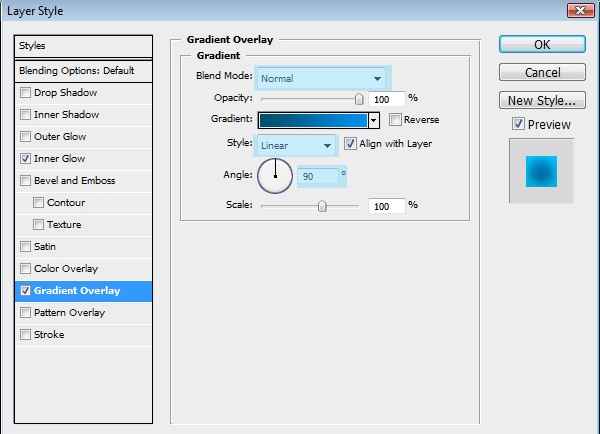
Add a Gradient Overlay and choose the default black and white. But replace the black with #00506d and the white to #152128.
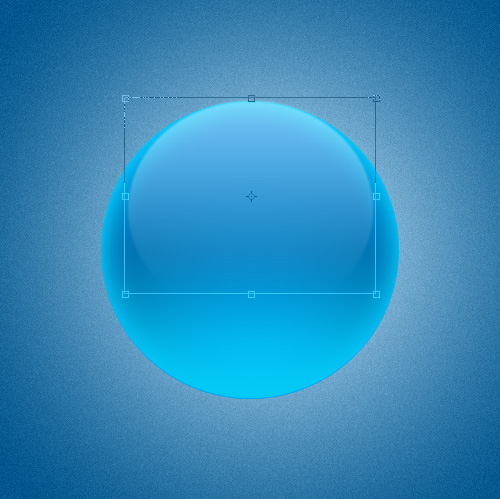
You should now have something like this.

Step 4 – Details
Turn the “orb” layer into a selection Ctrl + click on the layer, then create a New Layer and name it “bottom-glow”. Use the foreground color #01a8fe and with your Gradient Tool (G) selected set the gradient effect to Foreground to Transparent and style should be Radial Gradient hold the Shift key and drag your gradient from the bottom going up, stop before you get to the top of the orb. Repeat this step on a new layer and rename it “bottom-glow-2” exactly the same settings except for the gradient style which should be Linear Gradient.

Add another layer and rename it “top-gloss” turn the “orb” into a selection again Ctrl + click on the layer then make the foreground color #ffffff keep the last gradient settings except for the color and drag it, this time from the top going down. Then use the Transform Tool (T) and pinch it a bit on the sides. You may need to pinch it vertically as well just use your judgement here.
Then align it to top and keep it horizontally centered. Turn down the Opacity to 50% and give it a little Gaussian Blur 1-2% Radius should be enough.

Finishing touches
After that you can incorporate any logo or object you want but for me I used the Facebook logo I found on hdicon.com I used the dark Facebook blue for the color, flipped it vertically to create a subtle reflection and added a hint of shadow with the marquee tool. Remember to insert all of these below the “top-gloss” layer.
Finally with the Elliptical Marquee Tool (M) selected again I created a New Layer on top of the “main-bg” layer and called it “shadow”. Just drag it across to create a nice elongated shape, fill it with black and center it to your stage, make sure it clears the orb. Then give it a nice Gaussian Blur with a radius of 5% then a Motion Blur Angle 0 deg, and Distance 50.
And you’re done

Comments
4 responses to “Tutorial: Glassy orb style social icon in Photoshop”