In photography, bokeh (pronounced /boʊˈkeɪ/) is the blur, or the aesthetic quality of the blur, in out-of-focus areas of an image, or “the way the lens renders out-of-focus points of light.” – Wikipedia
A few days ago, a friend of mine asked me if I know bokeh. And thinking he meant the photograph effect of lights using DOF (Depth of Field) I said “yeah sure”, only to discover in the end that he meant how to recreate the effect in Photoshop. So to make a long story short, he explained that he was following a step by step tutorial but he didn’t get the same final output. After a few bouts with “what if you do this…” ideas from the top of my head that didn’t help the situation at all, he finally sent me the link to one of Fabio Sasso’s tuts on the subject posted on September 24, 2008 titled “Awesome digital bokeh effect in Photoshop” at abduzeedo.com
So I decided to recreate it myself to have a first hand perspective of what was going wrong. Everything was great until I reached Step 5 when I saw a hex code for yellow but it was giving me blue, so I just manually picked a yellow color myself, small problem solved. Then lo and behold after step 5 I got stuck. Eventually I figured out what was causing my problem, probably something got lost in translation, go figure. I checked the comments section and saw a lot of people were experiencing the same problem so I posted my two cents, but since the tutorial was 2 years old I decided to recreate it here at prodigalconcepts.com and maybe help others get the final output right.

So here we go…
Difficulty: Beginner – Intermediate
Duration: Less than 30 minutes
Let’s set up the stage
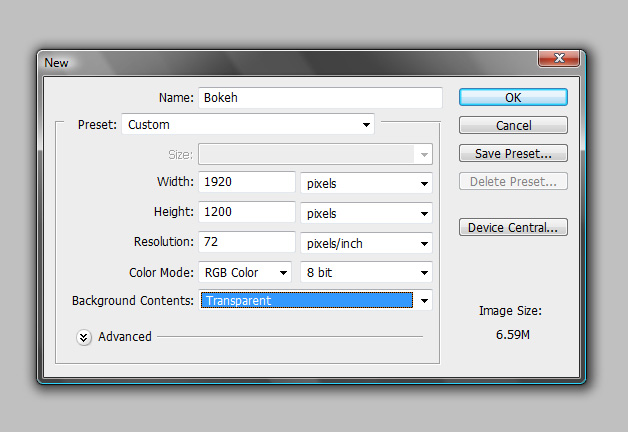
Create a new file and name it “Bokeh” make the dimensions (width x height) 1920 pixels x 1200 pixels, this will be an awesome “Wallpaper” project.
Create a brush
OK nobody panic, you heard me, we need create our own brush tip for this to work. We will utilize the powerful brush engine built in photoshop. Let’s begin by creating a new layer, then get your Ellipse Tool (U) on your tools palette, and while holding the shift key drag your ellipse tool to the center of the stage to create a nice big circle. The size is really up to you.
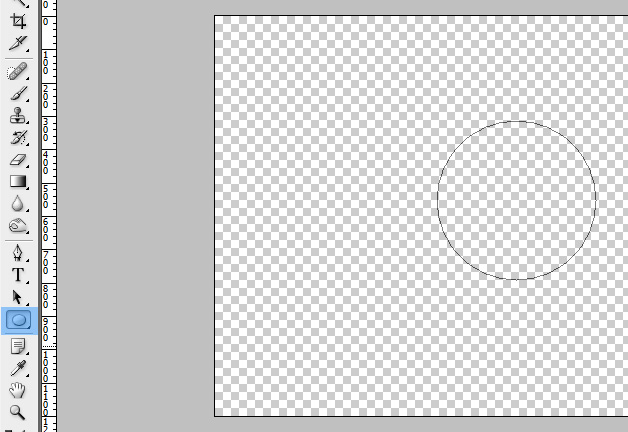
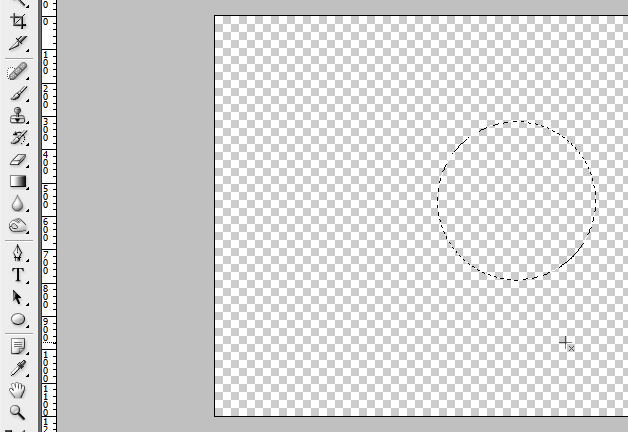
Then turn it into a selection (Alt + Backspace), (let the marching ants in).
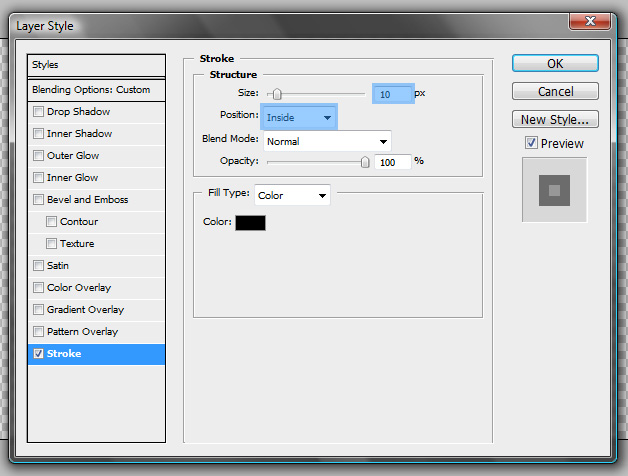
Now fill your selection with #000000, change the opacity to 50% go to Blending options, (right click layer to open Blending options) add a Stroke set color as #000000 and Size: around 10px – 15px and Position: Inside. Now we have a nice transparent circle with an inside Stroke this will be our brush tip.
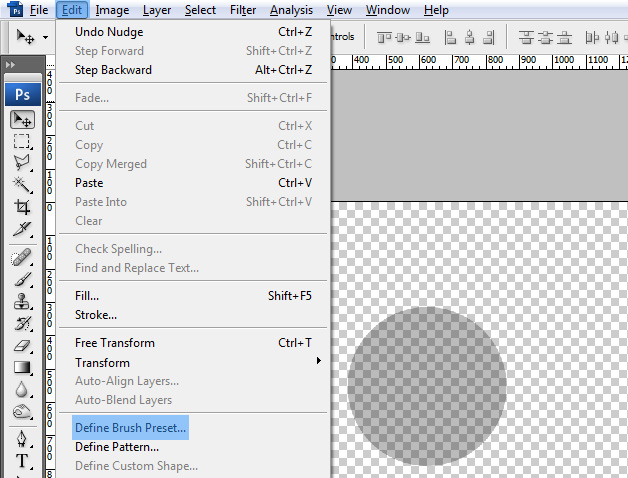
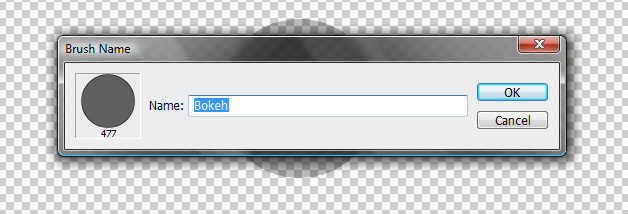
We can now define our brush, just go to Edit > Define Brush and name it “Bokeh”.
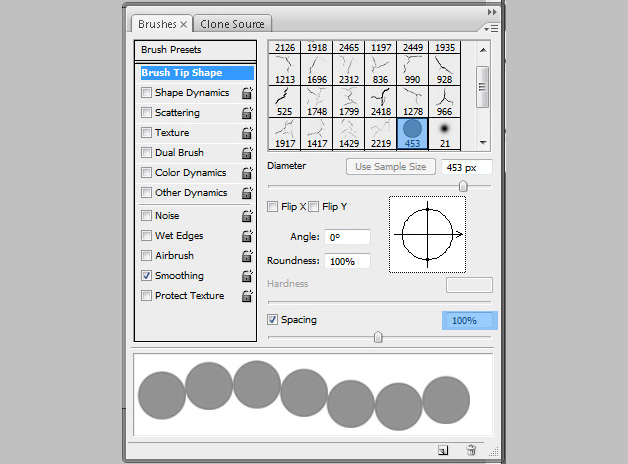
We will then tweak our Brush settings just open our Brush options choose Brush Tip Shape, and make sure you have the right Brush Tip, then adjust Spacing to 100%.
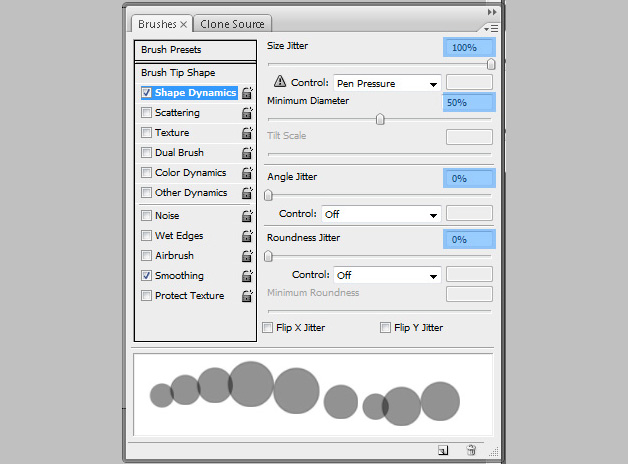
Next is Shape Dynamics, move Size Jitter to 100%, Minimum Diameter to 50% the rest is set to 0%
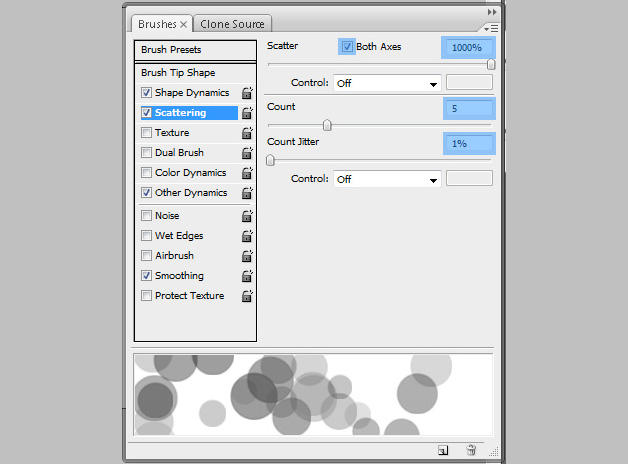
Then we will adjust the settings for Scattering, first tick the box for Both Axes and input 1000%, set Count to 5, and finally Count Jitter to 1%
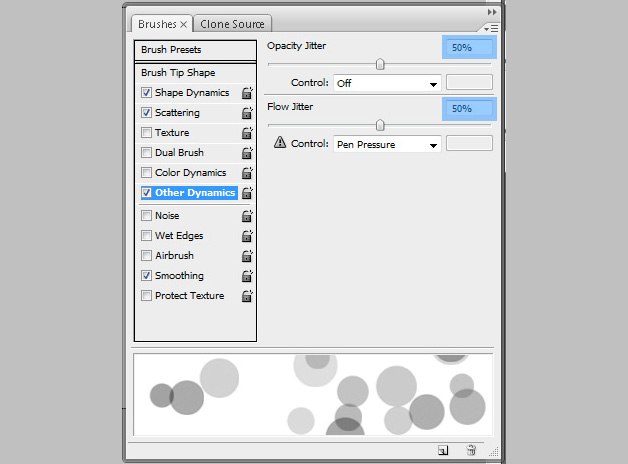
Last option we will adjust is Other Dynamics, just set Opacity Jitter and Flow Jitter to 50% and were done with the brush tip you can now turn off this circle image layer we used to create the brush tip by poking the eye next to your layer.
The foreground and background
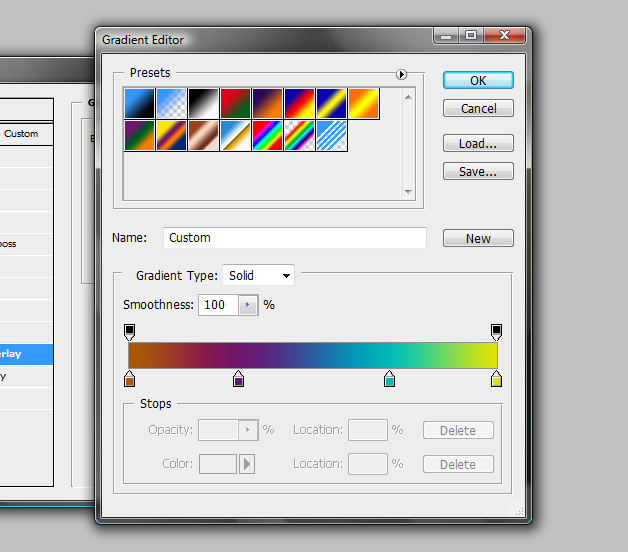
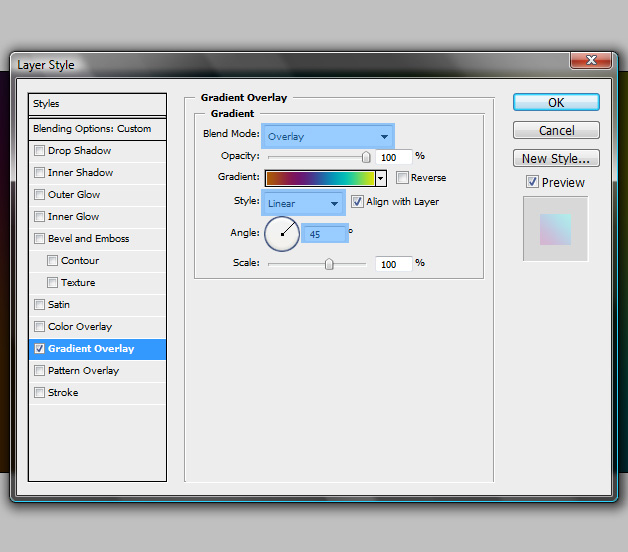
Now is the tricky part, we will create a foreground that will act as the background, confused yet? No worries! Let’s create a new layer on top of everything else and name it “Foreground” fill this layer (I’m using black), then on the Blending Options menu add a gradient effect, you can fill it with any color you like but for this tutorial I’m using a 4 shade gradient, Yellow, Blue, Purple, and Orange, I wont use any Hex Codes for the colors so you guys can just go crazy. Now set the gradient’s Blend Mode to Overlay, Opacity to 100%, Style is Linear, Angle at 45º then make the Fill to 0%.
Now to do the actual background, create a layer below all the other layers and fill it with a grayish black, pure black will not work well, I will be using #262626, now we are ready for the “Bokeh” effect.
Your combined “Foreground” and “Background” should look something like this, (unless you used a different color scheme “Gradient”)

The bokeh
Create a new layer between the “Foreground” and the “Background” layers and name it “Bokeh3” we will work our way back to front, giving our image some “Faux” Depth of Field (DOE). First get the Bokeh Brush (U) (the one we made earlier) from your Tools Palette (U) and make the size around 500px – 600px (try to use the bracket keys on your keyboard for adjusting brush size. Right Square Bracket key ( ] ) to increase and Left Square Bracket key ( [ ) to decrease brush size) then just brush it across your work area (choose White for your Brush color). Then go to your Filter > Blur > Gaussian Blur and make the Radius: 20px, change the Blend mode to Color Dodge.
You should have something like this…
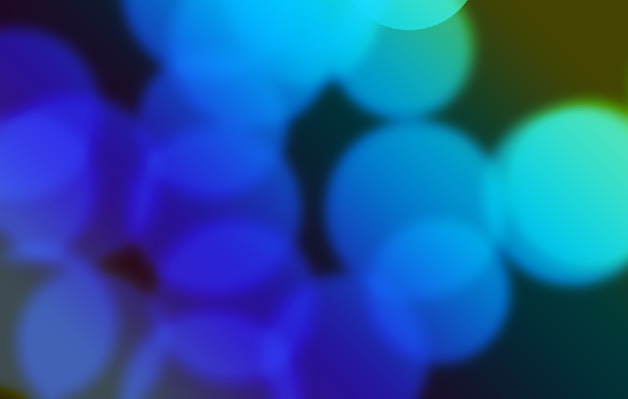
Make another layer on top of “Bokeh3” and name this layer “Bokeh2” make your brush slightly smaller maybe around 300px – 400px brush it across your work canvas then add a Gaussian Blur effect with a 4px Radius then Blend mode to Color Dodge.

Now for the last layer that will go on top of your “Bokeh2” layer, name it “Bokeh1” make your brush size slightly smaller than the previous layer, then do the brushing across the canvas then the Gaussian Blur with a Radius of 1px > Color Dodge . And your done!

If it doesn’t look like my final image, check your layers panel against mine. You only need 5 active layers, “Foreground”, “Background” “Bokeh1”, “Bokeh2”, and “Bokeh3”
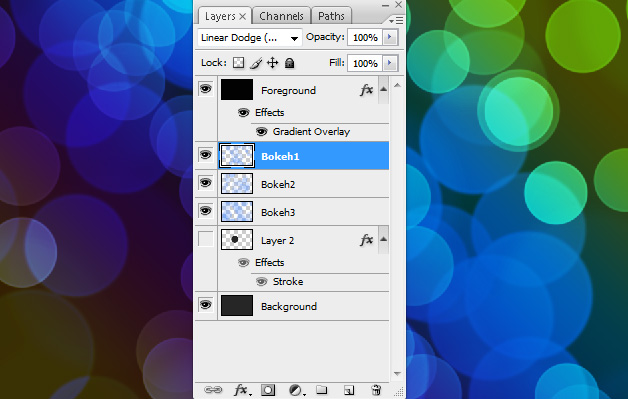
Now the rest is all up to you how you would want to jazz up this wall paper, you can use it for your “Desktop”, your “iPad”, or your “iPhone” just change the dimension according to your needs. I hope you all enjoyed this tutorial, as much as enjoyed recreating it with you.
Final Output

Variations


Comments
4 responses to “How to recreate a digital bokeh effect “a la” abduzeedo in Photoshop”