I was finally able to get some free time so we can now continue on our overdue project “The Ninth Planet“. And today we will be working on the skyscape the second part of a series that will put us halfway through our project. For those who came here directly please check out A photo manipulation tutorial, landscape – The Ninth Planet before moving on.
What we will be making

What we need for this project:
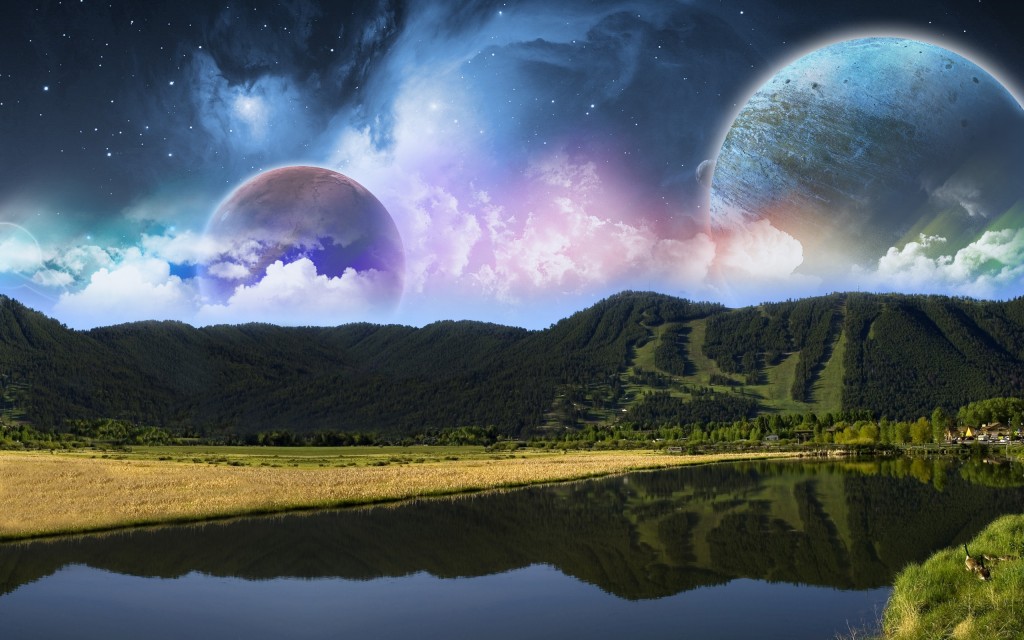
- The “landscape” we made from the previous tutorial.
- Planets (image pack) by Obsidiandawn
- Clouds by JavierZhX from devianart.com
- Grunge Tile texture from unsigneddesign.com
- Brick Tile texture from premiumpixels.com
- Nebula which we are borrowing from the awesome tutorial of Patrick Monkel Making a Superhero Movie Teaser Poster from wegraphics.net.
It’s time to re-open our “Ninth Planet” .PSD file. First create a new layer below our “landscape” layer and then place the downloaded “bw-nebula” image we borrowed from Patrick Monkel’s tutorial by going to File > Place > (image file location) luckily for us its dimension fits our working canvas so we don’t have to work on it much, in addition the layer is converted to a “Smart Object”. Rename this new layer “nebula”.
Flip our “nebula” image using Transform > Flip Vertical, then nudge it upward. Do this while holding down the Shift key then with the Up Arrow key nudge it up 20 times.

With the help of a nice soft brush, we will mask the “landscape” layer’s sky a bit. To do this make sure you have your “landscape” layer selected and then click the button that resembles a Japanese flag to Add a layer mask to it.
Get your Soft Brush and make its diameter around 300px. Set your foreground color to #000000. Start brushing away some of the sky. Follow the curves of the mountain as close as you can. To make sure you don’t miss any stray pixels use the Blending Options and add a Stroke.

Clean up the stray pixels then remove the Stroke, Right Click on the layer Clear layer style.

Our sky needs a thin atmosphere, so create a new layer above the “nebula” layer and rename it “atmosphere” set your Foreground color to #a0c7fe and with the Gradient Tool set to Foreground to Transparent, drag it vertically starting from the bottom going up.

The skyscape feels a bit dull, it needs more tint or color. Let’s give it a nice gradient map. Set your Foreground color to #4a94f9 and the Background color to #32445c. And make sure the “nebula” layer is selected, simply click on the “Create fill or adjustment layer” button below the layers palette, it’s the one that looks a bit like a Yin / Yang symbol next to the “Add layer mask” button.
Choose Gradient Map…, this will create an adjustment layer using the foreground and background colors we have set on top of the nebula image. And since we only need this for the nebula layer we have to clip it.
To do this hold down Alt key and hover your mouse over to the line between the “Gradient Map” adjustment layer and the “nebula” layer, the cursor will change to a black arrow with two small circles over lapping each other, click your mouse. The “Gradient Map” adjustment layer will now have an arrow pointing down. This means that it’s clipped to our “nebula” layer.

It’s still feels a bit weird let’s add another “adjustment layer”, repeat the previous step this time using “Hue/Saturation”. First tick on the Colorize box then set
Hue: 215
Saturation: 45
Lightness: +5
To finish it off, add another “adjustment layer” this time a “Curve”, give it an
Output of 150 and an
Input of 120. Don’t forget to clip it.

I think we got it now, time to add some clouds using the cloud brush pack by JavierZhX that we have found on deviantart.com.
Create a new layer at the very top, and rename it “clouds”, now I will leave you guys the option which cloud style to use just make sure you cover the entire width of our work area. Start brushing the clouds above the mountain range, you can use more than one style (mix it up) don’t worry if it overlaps the mountains. We can clean it up inside a mask with a brush afterwards.

I would like to add a mystical effect behind the clouds, first duplicate the “clouds” layer and rename it “aurora” place it behind the clouds layer then go to Filter > Blur > Motion Blur and set the following;
Angle to 45° and the
Distance to 250, click OK.
Now open your Blending Options… for “aurora” and give it a Gradient Overlay, use these settings;
Blend Mode: Exclusion, and set gradient to
Rainbow to Transparent
Style: Linear
un-check Align with Layer
Angle to -45°

You should have something like this.

We are now ready to add some planets, initially I was all set up to use Obsidian Dawn’s image pack (Planets) but when I placed the Mars2 image which was what I used with the original “Ninth Planet” photo manipulation it was dwarfed in comparison simply because the canvas of this tutorial is four times the size of the original piece. What a predicament!
Let’s improvise and make our own! Open the Grunge Tile texture in Photoshop. Turn this into a Selection (Ctrl + A) to see the dimension on your Info Palette, it shows that we have 3264 X 2448. So while the image is still selected Copy (Ctrl + C) it then Create a new file (Ctrl + N) and make the dimension 2448 X 2448 (square) and Paste (Ctrl + V) our texture here.
We have to center our image so turn it into a Selection (Ctrl + A) then make sure you have your Move Tool (V) selected hit Align horizontal centers button located at the top of the staging area.
Next we will squeeze our texture image to fit our square canvas, go to Transform (Ctrl + T) then highlight the Width option and start squeezing using the Down Arrow keys up to around 75%.

Next go to Filter > Distort > Spherize, with the following settings;
Amount: 100%
Mode: Normal
Hit Ctrl + F to do it one more time. To extract our sphere from the rest of our image, we will use the Ellipse Tool, just drag it across our canvas while holding the Shift key starting from the top left corner. It doesn’t have to be perfect but try to get as much of the sphere as you can. Use “Vertical and Horizontal align centers” to keep it centered, Ctrl + Enter to turn the ellipse into a selection. Select the texture layer and Add layer mask to isolate the sphere.
There you go, instant planet! We can now use this in our project.

Place the planet image below the “atmosphere” layer and rename it “planet-x”, position it to the far right and make adjustments as you see fit. I wanted the bottom left to be seen with what looks like craters so I rotated my “planet-x”. Now we will add Blending Options.
Outer Glow
Blend Mode: Screen
Color: #FFFFFF
Size: 60px
Inner Glow
Blend Mode: Overlay
Color: #FFFFFF
Size: 250px
Almost there, set the Foreground color to #3399ff and the Background to #a0c7fe create a new layer and rename it “x-atmosphere” then go to Filter > Render > Clouds and clip it to our “planet-x” layer, use Multiply for the Blend Mode.
To give it a dark side (of the moon-ish effect), add another layer above the “x-atmosphere” layer then select the outline of our planet (inside the mask) and turn it into a Selection (Ctrl + click), now set your Foreground color to #0e1722 and your Gradient Tool to Foreground to Transparent. Drag a gradient starting from somewhere in the middle of the selection going diagonally up and left, use your judgment here. Add Filter > Blur > Gaussian Blur, Radius: 25px, then clip it.

Now that we have an imposing planet I think it’s safe to use our stock planet images from Obsidiandawn I will be using Mars2 and Saturn3. So start isolating your planets. If you’re not sure how to do this check out my article on How to extract an image from its background in Photoshop.
Once you have isolated the planets, start incorporating them to our work stage. Make sure you place them below the “atmosphere” layer. I’m going to start with Mars and place it off center near the left hand side. I think we need to add some color to Mars by giving it an “adjustment layer”,
Hue/Saturation
Colorize tick it on
Hue: 360
Saturation: 23
Lightness: 0
You may want to give it the same treatments as “planet-x” from this point on, the settings would vary but basically we will use the same glow elements. Do the same for “Saturn3”. You can add more planets using other textures like what we have done for “planet-x”.
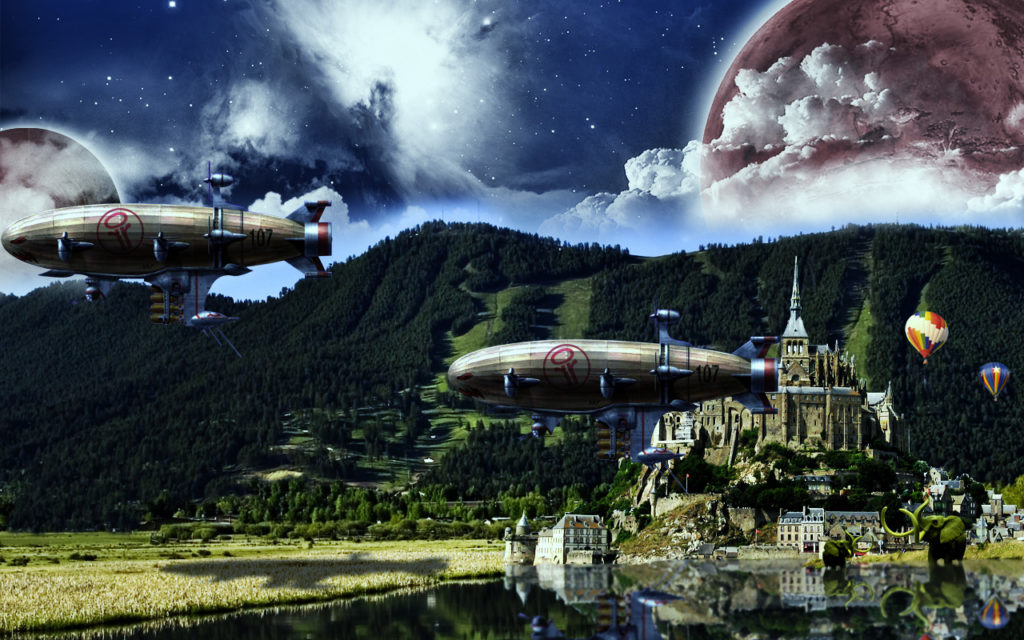
Final result
Click the image for a closer inspection and enjoy.
Comments
7 responses to “A photo manipulation tutorial, skyscape – The Ninth Planet part 2 of 3”