As we reach the conclusion of our somewhat epic of a tutorial for “the Ninth Planet” that began with the creation of our landscape eventually followed by skyscape and now we will continue working on realm. I would just like to thank everyone who stopped by and followed this tutorial series. I hope you guys found it useful, educational and fun, please don’t forget to share.
That being said let’s get down to business.
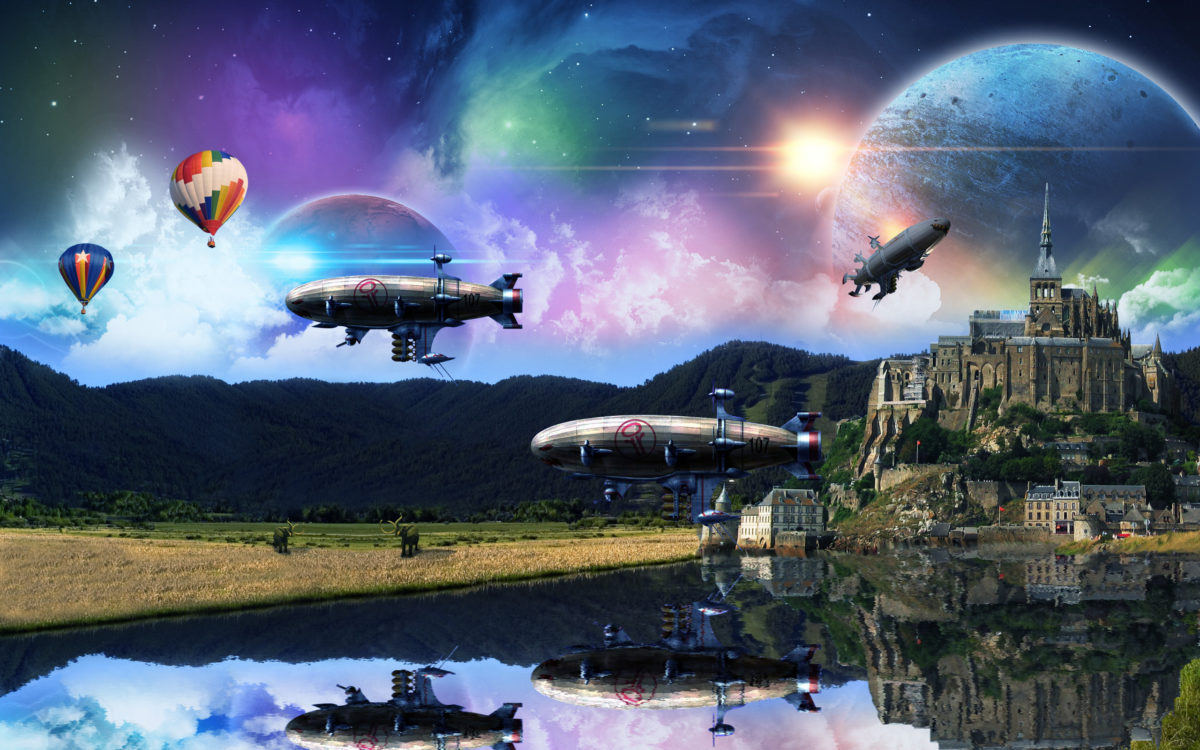
What we will be making

What we need for this project:
- Castle from imageafter.com
- Hot air balloon from pixmac.com
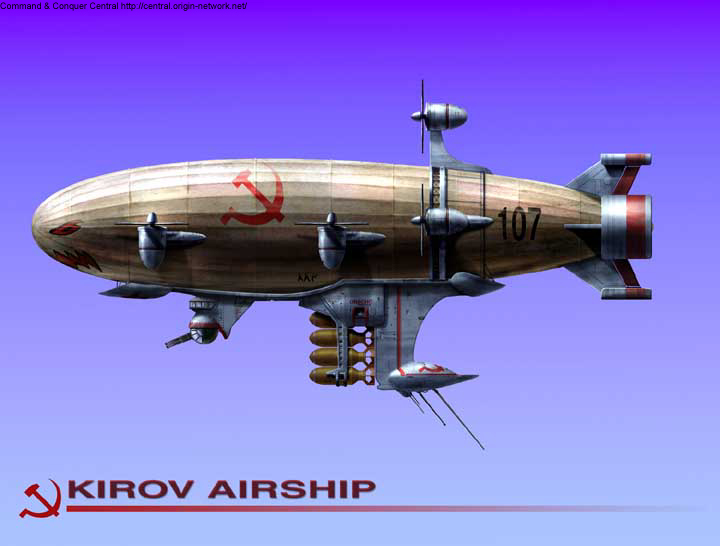
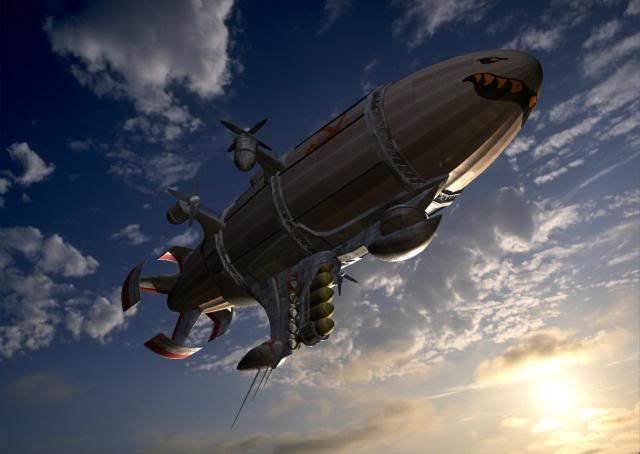
- RA2 Kirov from cncguild.net StoneDragon.jpg from EA forums
- Elephant from pixmac.com
- PSD file from the skyscape tutorial
“Previously on Prodigal Concepts” we found and used this landscape stock image that we got from pixmac.com
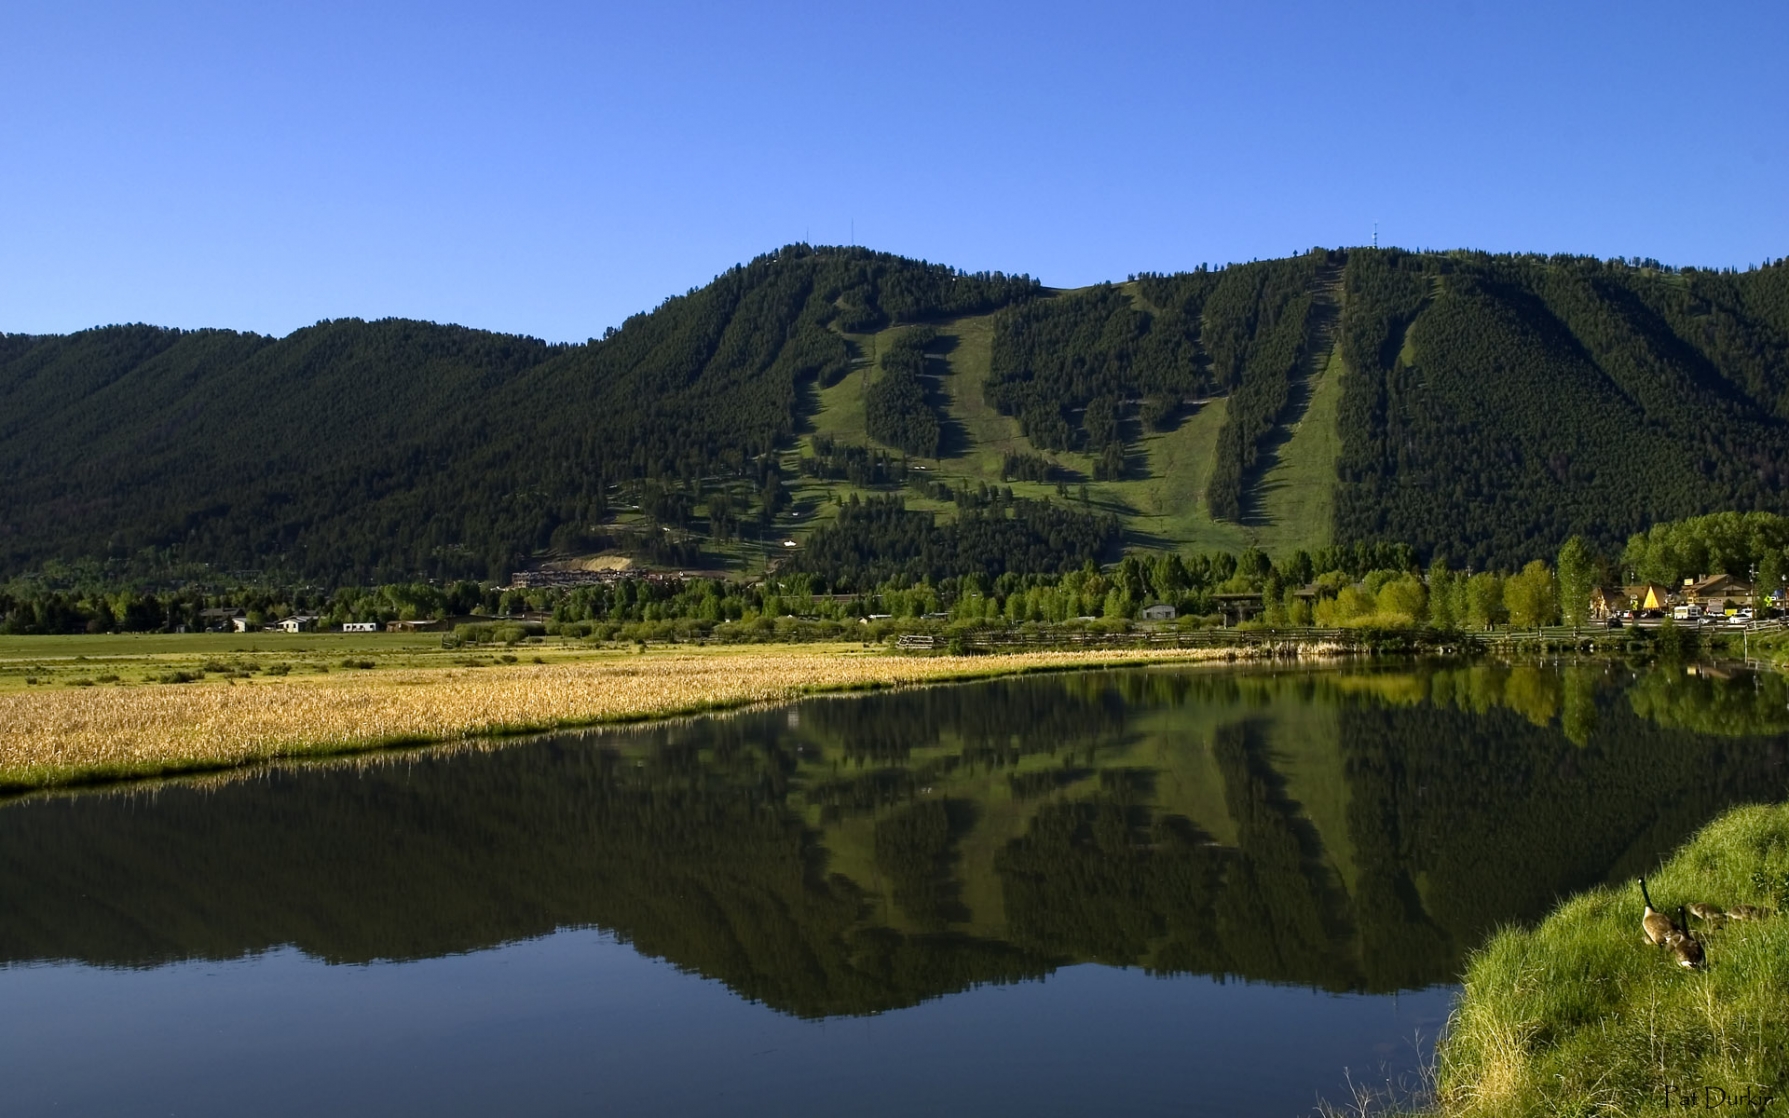
and with the help of Photoshop we duplicated, flipped and cloned parts of the image to make it look like one single shot that would fit nicely in our 2560px work area so that we could finally have this

after that we populated the heavens with stars, planets, clouds and colorful gasses.

So finally we are almost at the end of our journey and moving on to the last stages of our composition. But before we continue make sure you group the previous layers accordingly “landscape” and “skyscape” you can do this by selecting the layers you want to group together then drag them to the folder looking icon at the bottom of the layers panel.
Update the water reflection
Now check out the reflection of the sky and mountain on our body of water. It’s not the same sky right? So first thing we will do is take care of that problem.
If you have your “Ninth Planet” .PSD file open. Create a new layer at the very top of the layers panel and rename it “reflection-sky” then simply Select All or Ctrl + A and make a copy of the entire file or merged layers Ctrl + Shift + C then paste it Ctrl + V to the “reflection-sky” layer we’ve just created, this will be the first layer on the third group which we will call “realm”.
Flip the “reflection-sky” layer image vertically Edit > Transform > Flip Vertical, then reduce the Opacity to around 50% or less so we can see through the image. Start moving it downwards Shift + Down Arrow until the mountain edges of the reflections align, it’s not going to be perfect so just try the closest you can get.
Now let’s add a layer mask to “reflection-sky” layer and with a soft brush tool, brush off all the excess areas that is not part of the water reflection. Use the Blending Mode “Stroke” to help you trim the edges, like what we did for the sky of the original background in the “skyscape” tutorial. Don’t hesitate to zoom in if you need to. Turn Opacity back to 100% when you’re done masking.

Apply Filter Effects
Our “reflection-sky” layer desperately needs some texture. To give it that ripples effect, like there’s a very light breeze running over it. We will add some “Smart Filters” to create this effect, Smart Filters is a non destructive way to add a filter to your images. It will help us preserve the quality of the original image and will give us the option to make adjustments to the filter settings later when we need to. So while the “reflection-sky” layer is still selected go to Filter > Convert for Smart Filters, then click OK. Our layer is now converted to a “Smart Object”.
Now go to Filter > Brush Strokes > Sprayed Strokes and make the following adjustments.

Next lets give it some “Plastic Wrap” filter, go to Filter > Artistic > Plastic Wrap and use the following settings.

For an extra touch add Filter > Blur > Motion Blur, set Angle: 0 and Distance: 2
You should have something similar to this.

Adding details
Now for the fun part, placing the last elements that would finally complete this project. If you guys haven’t done so, you may begin downloading the required stock photos and extract the images from their backgrounds I suggest starting with the “Castle” photo.
Castle
Place the isolated copy of “Castle” photo on our working file, make sure it’s at the top most layer rename the layer “Castle”. Reduce it’s size a bit, I suggest 18% – 20%, and place it on the right hand side just by the edge of our lake.

Lets tweak it a bit, click on the “Create new fill or adjustment layer” button, select “Curves…” click OK then clip it to the “Castle” layer (hold ALT then click on the line between the two layers) open “Curves…” again (double click on the adjustment layer) and try to match these settings.

It doesn’t have to perfect. Your monitor might show a different result anyway so use your judgement here. Click OK. What we are trying to achieve is to make it blend with our background’s exposure.
OK now zoom in near the bottom of the “Castle”, notice the way I cut it out of the background left it with some really sharp edges that doesn’t look nice. For this grab your Smudge Tool (R), but if you placed your “Castle” image the same way I did which is File > Place… (location of the image) chances are your “Castle” layer is in “Smart Object” state. Right click on it first and then select Rasterize Layer now it’s just a regular image and ready for our Smudge Tool (R).
By the way before you click on Smudge Tool (R) make sure your Brush (B) tip is set to Soft Round use the Brackets [ ] keys to increase or decrease the brush tip whenever necessary.
Start smudging, try to stay close to the edge and smudge away. Maintain random strokes and spaces. Spot the difference? After smudging the bottom edge looks more blended to the ground.

Duplicate the “Castle” layer (don’t forget to include the curve adjustment layer.) Select both layer copies “Castle-copy” and “adjustment layer-copy” then Right Click > Merge Layers rename it “Castle-ref” and drag it below the original “Castle” layer.
Now flip it vertically, Edit > Transform > Flip Vertical and move it down, Shift + Down Arrow right before a gap shows between your two images.
Then repeat the steps we made in “Apply Filter Effects”. Add a Layer-Mask so we can Brush off excess of the reflection that’s not touching the water. Like the left part of the “Castle-ref”.
Do the same for the rest of our images. Unless they’re not supposed to be seen from the reflection on our “Lake”.

I will be placing a couple of elephants on the field, I will give some shadows with the help of brushes and the elephants outline selection.

The hot air balloons will be on the top left hand side. I gave it a dash of clouds from the “cloud” brush pack by JavierZhX, we’ve downloaded from deviantart that we used on the second part of this tutorial.

The rest is just some last minute changes, I went back to the “skyscape” group and using a large soft brush I dabbed on the top most left hand side. Using yellow, purple and green respectively. Gave it a Blending Mode: Overlay, and Opacity: 90%.

After my new year wallpaper tutorial I’ve decided to give this final piece some Optic Flare effects for extra character, that you can get from psdbox.com’s optic flares. Since I’m still in the “skyscape” group folder anyway I figure it’s a good time to include these effects.
And finally we’re done
Finishing touches: Ctrl + (N) a new layer, then get your “Gradient Tool” and set the Foreground color to #5e758c and the Background color to #165a9e now drag it across diagonally starting from the bottom right ending at the top left corner. Set the Blending Mode: Soft Light to give it a more dreamy feel.
Comments
3 responses to “A photo manipulation tutorial, realm – The Ninth Planet part 3 of 3”