When HDR images started attracting my attention on websites like deviantart.com and flickr.com a couple of years ago I was totally blown away. I didn’t even know what I was looking at, is this a CGI, a digital painting or a photo manipulation?
The picture details are so vivid that I wondered how it’s even possible to capture an image with that quality. So I crawled around Google and discovered that HDR or High Dynamic Range images are composed of multiple layers of the same image merged into one.
High-dynamic-range photographs are generally achieved by capturing multiple standard photographs, often using exposure bracketing, and then merging them into an HDR image. Digital photographs are often encoded in a camera’s raw image format, because 8 bit JPEG encoding doesn’t offer enough values to allow fine transitions (and also introduces undesirable effects due to the lossy compression). – Wikipedia
OK let’s try to understand this in layman’s terms, our vision can only focus on a set of details in a particular scene, we can’t see every detail with one look but we have our memory to remember the elements of what we see and we can combine it in our mind. This is the same with a camera lens, a camera can only focus on a set of details, not the whole scene. Which is why in photography we focus on a subject to make it stand out from it’s environment.
With the help of software apps we can create a detailed version of an image taken with a digital camera and combine them together to show all the details in one image.
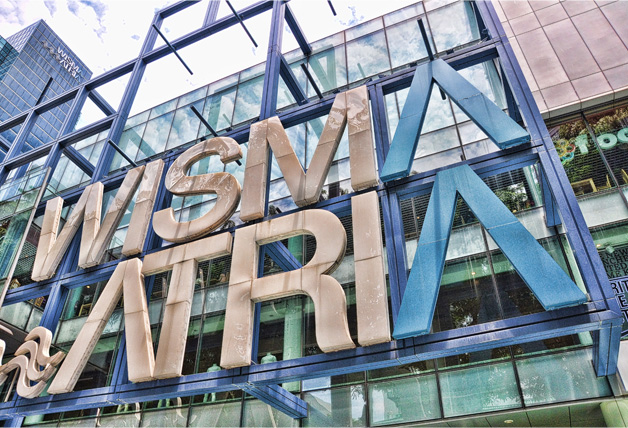
To simplify here’s an example, let’s pretend we are shooting outdoors, we have the sky, clouds, water, buildings, statues, lots of textures and colors are everywhere. For this we need a tripod or any stable platform you can rest your camera on. Take a shot of the scene setting the exposure and focus for the sky + clouds, next shot exact same scene focus this time on clouds + water, then water + buildings and statues. So you will end up with at least 5 images of the same scene with different points of focus and exposure.
Then you need to blend all this together with the help of a software like Photoshop and Lightroom another software you can use for this is Photomatix. It’s not easy but with practice and a little investment on software applications needed to merge these, one can achieve a good quality HDR image in no time.
Helpful readings on “How to achieve HDR images”
-
HDR Tutorial – Everything you need to know about HDR photography
If everything I said sounds complicated (coz, it is) and if you feel that HDR photography is just for professionals, maybe, but then again that line of thought is totally wrong! Anyone (including you) who can use a 1. digital camera (even point and shoot), a 2. computer and tweak around with 3. Photoshop can create High Dynamic Range images with the help of an amazing Photoshop plugin called Topaz Adjust by Topaz Labs, you can even have mind blowing pictures using only one photograph.
I know a lot of purists will be shaking their heads just about now, and say in their big voice, “What? Use a plugin to make HDR images? That’s preposterous! An abomination! Get the torches and the forks, gather the women and children, assemble at the town hall!”
Well, we can’t all go back to the stone age can we? At least not until Sir Richard Branson pays for the development of a commercially available “Time Machine”. Anyway the more hardcore of purist still thinks post processing is not professional, they say that Photoshop is the work of the devil and pictures that were processed after being taken by the “Photographer” is not photography. Duh!
Moving on Topaz Labs came out with a wide array of software products you can use with Photoshop to make your pictures stand out. One of them is Topaz Adjust which I had the pleasure to test drive for a month and I just have to say “if it was a car it handles really well”. It’s fairly simple to use, its user interface is sleek and straight forward you will be able to navigate through the controls without a hitch and the result is just brilliant. Plus with the price that’s less than $50 I think we have a winner here (a 30 day trial version is available for you to wet your lips on).
Let me introduce you to Topaz Labs – Topaz Adjust 4
What does it do? Simply put it makes your photos pop in less time it takes a purist and a hardcore purist to say Photoshop Photography Post Processing. Adjust can optimize image exposure, it’s color, and detail strength for stunning image results. Topaz Adjust makes this process simple, fun, even highly rewarding.
Let’s have a short walk through on how to use Topaz Adjust. What you will need:
1. A nice image you want to play with preferably an outdoor scene with lots of textures and colors
2. A copy of Photoshop
3. and of course Topaz Adjust (use the 30 day trial version just for kicks)
Get your copy of Topaz Adjust here
Assuming you already have Photoshop installed (I’m using CS3 for this exercise) Run the setup file of Topaz Adjust and install it to your machine.
Here is our sample image
Immediately you will notice that our sample image is overexposed, and whatever details and drama the photographer saw when this picture was taken is now lost in all the brightness of the background.

When Topaz Adjust setup is complete open your image in Photoshop and create a duplicate image of your original layer, this way if something goes wrong you still have your original image. (You are welcome to use my image for this walk through).
Then simply go to Filter > Topaz Labs > Topaz Adjust it will take you to the Topaz Adjust interface.
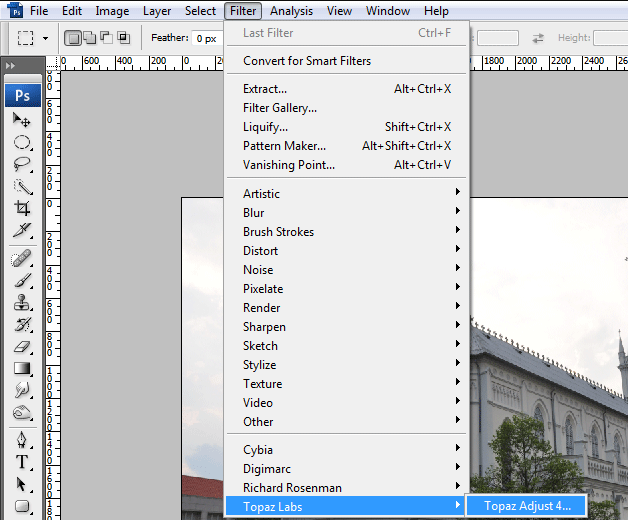
As you can see it’s very self explanatory…
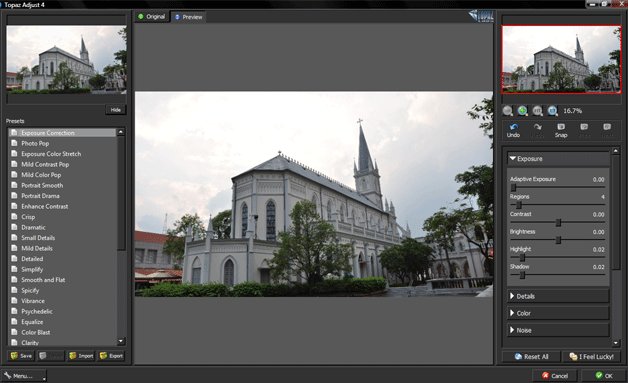
Left side panel
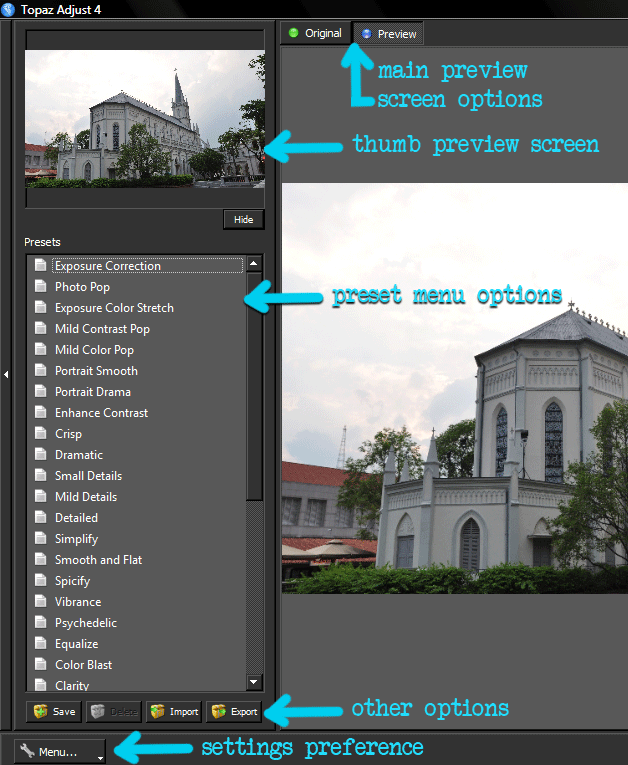
On the left side panel, from the Top you have your Preview options for the main image at the center of your screen. With it you can go back and forth from your original image to the modified image and vice versa.
The thumb preview screen is a cool feature, it allows you to see image changes as you hover over the preset menu. Only when you click on the Preset of your choice will it be applied on your image. It takes a lot of computer memory to generate a modified image especially if it’s a very large file (DSLR output). So this thumb preview screen will give you an idea how your image would look before you apply the changes.
Then you have the Preset menu options this is where the magic happens, each preset will give you an awesome photograph effect, from the simple Exposure Correction to the more artistic Psychedelic results and of course two settings for HDR that will make your ordinary photographs become extraordinary.
The Other Options buttons will allow you to add and delete presets, you can create your own preset using the manual sliders on the right side and save it in your Preset menu for future use.
Right side panel
On the right side panel you have your Information thumb screen, much like Photoshop’s information thumb panel it allows you to see which part of the main image you are working on if you are zoomed in.
Then you have your viewing options if you really want to get in there and see your main image up close or from a distance this buttons will let you specify your viewing preference.
Then you have undo, redo buttons we don’t have to go there.
Another juicy part of this interface is the Manual sliders, if you want to go without the presets and go old school using your gifted sight to achieve great results then this is your guy. You have sliders for “Exposure”, “Details”, “Color” and “Noise” to play around with. You can even save your settings to the Preset menu using the other option buttons on the left panel. And if your feeling adventurous you can even pick a preset and start your manual adjustments from there.
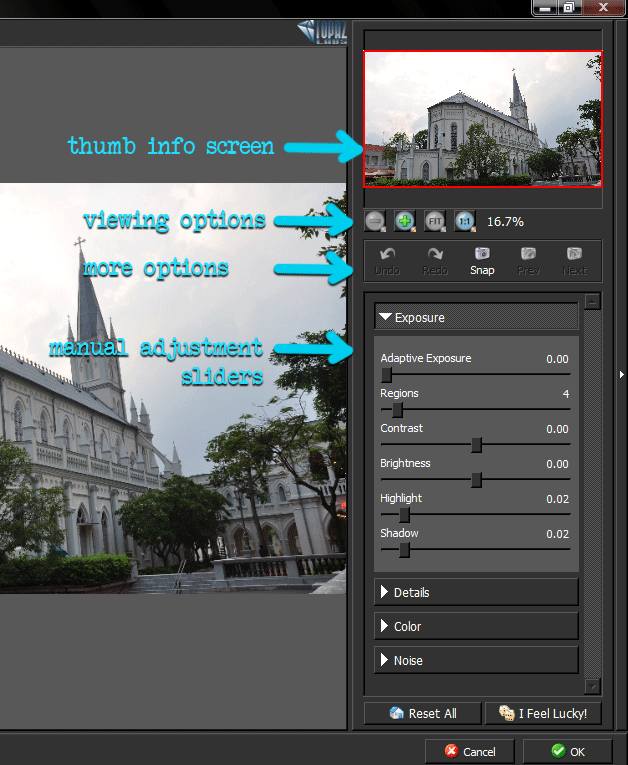
When you’re satisfied with your changes, just click “OK” and it will take you back to Photoshop, you can now save your new and improve photo as you wish or use it in a project while your still in Photoshop.
Check out what happened to the sample image after modifying it in Topaz Adjust using some of the “Presets” options:
Sample
Our sample is an overexposed snapshot where almost all the details were lost.

Spicify
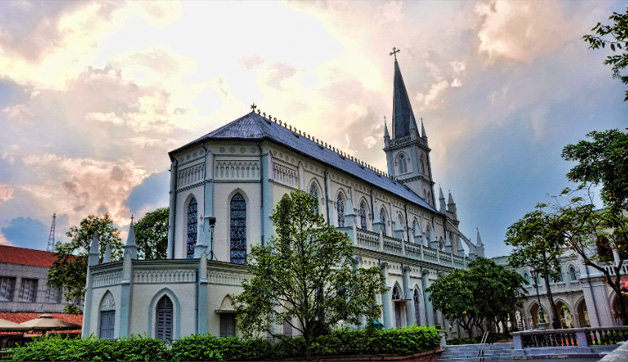
Psychedelic
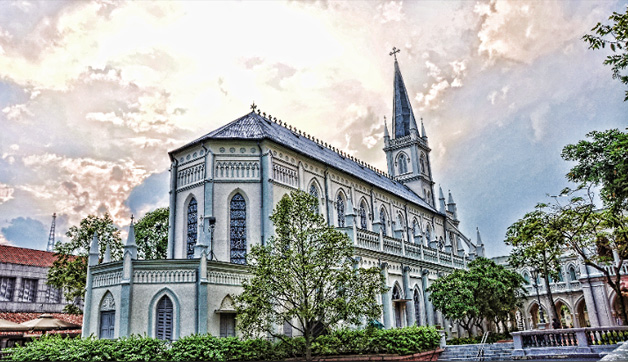
HDR
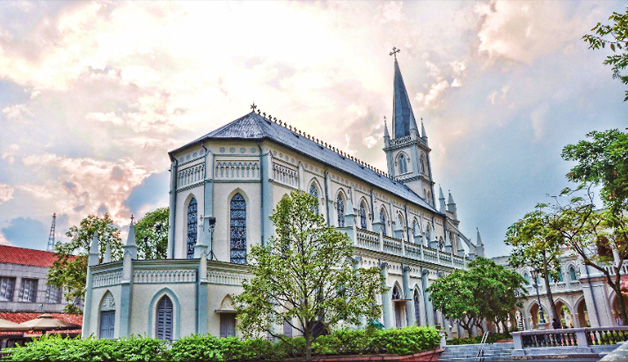
These are just 3 of the presets I like to use, I didn’t even touch the manual sliders to get these results but as you can see the output is amazing compared to the original photo. Test it yourself, I’m sure you will enjoy it as much as I did.
“If you use Topaz Adjust to modify your photographs share your work here at the comment section, just leave the URL for us to enjoy. Thanks”
Acknowledgements:
My wife Grace for taking that sample image, she has full rights to it but she’s generous enough to lend it to us for this exercise.
Of course Topaz Labs for the Topaz Adjust test drive.
And all the readers and friends who stopped by and shared this article.
Comments
5 responses to “HDR made easy with Topaz Adjust”