If you ever wanted to work with Photoshop Filters and didn’t know where to begin then this is your lucky day. We will use some of Photoshop’s filters to create our very own “Cork textured download button”.
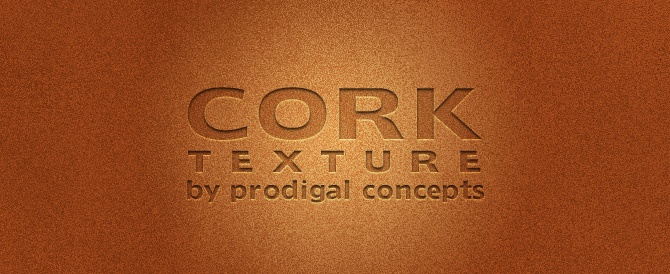
What we will be making

Setting up the stage
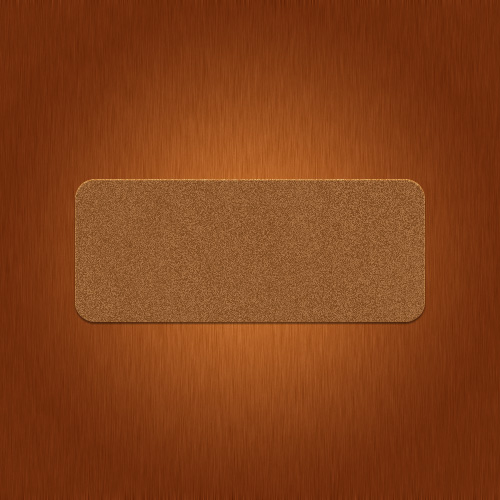
Create a new file and name it “cork” give it a 500 x 500 pixel dimensions.

Now go to your color palette and set the Foreground color to a nice warm brown color like #af7749 then a darker brown hue for the Background color something like #77451d should be fine. Fill the stage (Layer 1) with the background color using the paint bucket tool or the much simpler approach Ctrl + Backspace. (Note: Alt + Backspace fills your stage with the Foreground color)

Although were still just working on the background that would hold our featured button let me show you a few tricks to jazz it up a bit. First let’s give it some Noise, go to Filter > Noise > Add Noise, and give it the following adjustments Amount 5% | Distribution: Gaussian, tick on Monochromatic

What we are trying to achieve is a nice wood finish, let’s add some Motion Blur, Filter > Blur > Motion Blur. Set Angle to 90° and Distance to 15px. We could add some imperfections in the wood finish, like swirls and waves using the Filter > Liquify tool to make it more realistic but you can do that on your own if you want.

Let’s continue and start adding some lighting effect with the Blending Options, Right Click on your “Layer 1” then click on Blending Options… add a Gradient Overlay. Then give it the following settings Blend Mode to Overlay, Opacity: 75% then tweak the gradient color (Note: By Default the gradient is set in Black, White) we need to replace Black with “White” and the White with our dark brown background color #77451d. Then change the following- Style: Radial | Angle: 90°. That’s it!

Time to cork it
Create a new layer and rename this layer “cork-texture”, then go to Filter > Render > Clouds. You should have something like this.

Now we will add some fiber effect, Filter > Render > Fiber, give it some Variance: 20 and Strength: 4.0 so your clouds will turn into something like this.

Then finally here’s the “Pièce de résistance” we just need to add the last filter, this time go to Filter > Distort > Glass, make the following adjustments. Distortion: 15 | Smoothness: 1 | Texture: Frosted | Scaling: 100%.

Now take the Rounded Rectangle from your Shapes Palette, make sure it’s set to Shape layers, with Radius: 20px and drag a nice rectangle Width: 350px and make the Height: 140px. We have just created a new layer which we can rename and call “outline”.
Keep it centered with the Horizontal and Vertical Align tools. Then turn it into a selection (Ctrl + Click). Make sure the “cork-texture” layer is selected then go to the layers panel options and Add Layer Mask. You can now hide the “outline” layer by poking the eye next to it.

Details
With the “cork-texture” layer still selected right click on it to bring up Blending Options… menu. You can just follow my settings.


Let’s add another layer this time below the “cork-texture” layer and rename it “shadow”, turn the “outline” layer into a selection and fill it with #000000. (Note: You don’t have to turn it on to create the selection from it just hold Ctrl + Click the layer.)
Apply a gaussian blur filter, Filter > Blur > Gaussian Blur, set the Radius: 2.0px click OK then reduce the layer Opacity: 50%.

Content
Select the “cork-texture” layer then grab the Rounded Rectangle from your Shapes Palette again, drag it inside the “cork-texture” layer while holding the Shift key, this would help you create a new layer that’s a perfect square with rounded corners on top of the cork. Then give it the following Blending Options… settings. And don’t forget to rename this layer “button”.


Well be including a “down arrow” shape and place it inside the “button” layer. You can use any arrow shape you want but in case you’re interested I got mine from Shapes4FREE’s – 120 Arrows Photoshop Shapes. Just drag the arrow shape and make the size fit inside our “button” layer, rename this new layer “down-arrow”, keep it horizontally and vertically centered.
Turn this “down-arrow” layer into a selection. Then make sure the “button” layer is selected now Add Layer Mask. You can now just hide the “down-arrow” layer as we are done with it.

Finally we can add some content. Use your judgement to position them inside our “cork-texture” layer. Right + Click the “button” layer and choose Copy Layer Style, now Right + Click on your “Text” layers and Paste Layer Style.
And were DONE!
Comments
7 responses to “Tutorial: Cork textured download button in Photoshop”